# Update Criteria
This is the last step in setting up TransparentRETS to import the RETS property class into Open-Realty.

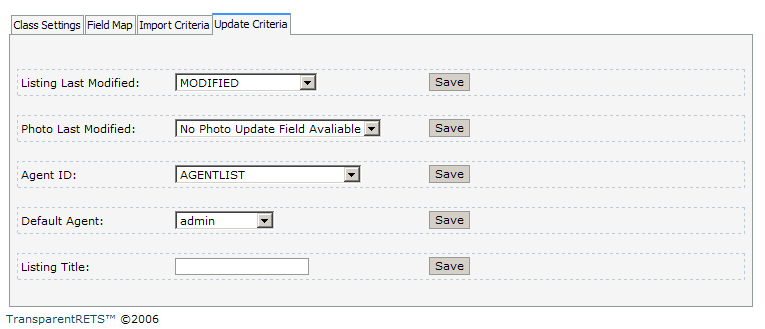
1. Select the field that contains the timestamp for when the listing was last modified. This field is often called "MODIFIED", "Last Modified", or something similar. After selecting the field press the Save button.
2. Select the field that contains the timestamp for when the listings photos were last modified. Not all RETS servers have this field. If your MLS does not use a photo last modified field you MUST select the "No Photo Update Field available" this will tell the import process to update based only on the Listing Last Modified field you previously selected. After selecting the field press the Save button.
3. Select the field on the RETS server that contains the listing agent's MLS ID. This is used to map listings to Open-Realty agents. After selecting the field press the Save button.
In Open-Realty you must create an agent field named RETS_AGENT_ID and for each agent you wish to map listings to enter there MLS ID into this field. The ID must match exactly what is in the selected RETS field. Any listings where the agent ID can not be found on an Open-Realty agent will be assigned to the default Agent below.
4. Select the default agent in Open-Realty to map listings to. After selecting the field press the Save button. We recommend that you use the admin user as the default agent. This is the user in Open-Realty that will own all the import listings that are not mapped to an Open-Realty agent based upon the Agent ID map created in step 3 above.
5. Enter a default listing title for your listings. You can use listing data in the title by entering the exact RETS field name in brackets. Eg. "Listing {MLS_NUM}" would result in {MLS_NUM} being replaced with the value from the MLS_NUM field.
9. You have now completed your setup of the import. You can now either go back and setup another RETS property class to import or you can proceed to run your first import command.
